
This weekend was super exciting because we all worked together to put up the outdoor Halloween decorations. Halloween is one of my favorite holidays because you can really go over the top.
The other day when I showed The Mr. the vampire hunting kit invitations his first words were, "You go overboard." Of course I took that as a compliment. My general philosophy in life is that if someone tells me I've done too much, then it means I've done just enough. But that's just me.
So here's the first shot of what our front porch is looking like right now. I still plan to add some more spider webs and a couple other odds and ends. I wasn't sure that the fake cobwebs would make it to the 31st with all the crazy weather we've been having but I figured I'd try.
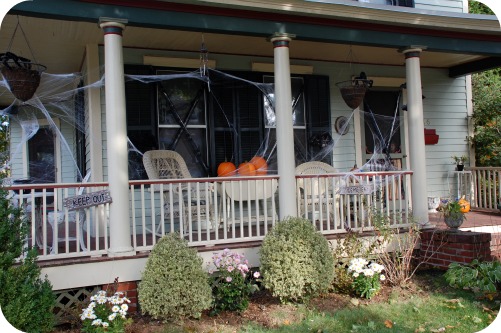

As you can see we haven't carved our pumpkins yet. Mateos did have a good time with his Nana painting one to look like the joker from batman. Maybe we'll get to the others later this week.
I also have a mini tutorial of an outdoor decoration I used. This is pretty simple and self-explanatory but I enjoyed it, so I thought someone else might as well.
 |
| Swarming Bats |
I was visiting Michaels for the 567,00 time last week and happened upon a pack of bat shape cut outs. There were 12 in the package and they seemed to be about the weight of poster board. Also, they were like 3 dollars, so I had to get them. I knew I would come up with some way to use them in our Halloween decorating. And I did yesterday.
Supplies:
Bat Shape
Black Spray Paint
All Purpose Varnish
Jewelry Fasteners *optional
Push Pin
Floss

Other than the bat shapes I had all these things at home. You could also cut your own shapes out of poster board if you wanted.
Step 1
Spray your bat black on both sides.

Step 2
Once the black is dry on both sides give it a thin coat of varnish. I’m hoping it will give them a little protection from the elements.

*Yes that is a plastic octopus in the box on the right.
I have a hard time knowing when to stop when it comes to spray paint.*
Step 3
I used a pushpin to make a hole at the top for threading.

Step 4
I had purchased these jewelry fasteners a while ago for another project and had been looking for a way to use them up. This step could really is optional.

Step 5
Attach some regular old floss. Cut it whatever length you want.

Step 6
Find someone to hang them up for you :) Or hang it up yourself. I had mine looped through the chains on our porch light at different lengths. You could easily hang them almost anywhere, indoors or out. But when they are clustered together it looks especially nice.

Step 7
Enjoy

Until next time.......
~Kayte
No comments:
Post a Comment